
The Redi- Green Guide to Laying Sod (Without Losing Your Sanity)
Step-by-Step Instructions to Create Your Dream Lawn in Sacramento and Surrounding Cities!
Step 1: Channel Your Inner Farmer (a.k.a. Prep the Soil for Sod)
Step-by-Step: Ground Prep for Sod Installation
2 Weeks Before (10 to 14 days)
Irrigate lightly for 2–3 days
Wake up existing weeds/grass so the weed killer is more effective.Spray a non-selective weed killer
Use a glyphosate-based herbicide per label directions on a dry, calm day.
Goal: Knock down existing weeds and old lawn so they don’t regrow through the new sod.Wait and watch (7–10 days)
Allow time for full kill. If you see green patches, spot-spray again and give them a few more days.
3–5 Days Before
Remove the old lawn with a rented sod cutter (best method)
Set the blade to cut just below the thatch/root layer.
Roll up strips and haul away (don’t till live thatch into the soil).
This keeps the soil profile clean and prevents future bumps.
Edge & hardware check
Expose sprinkler heads, valve boxes, and borders.
Cap/repair any broken sprinkler parts before grading.
1 Day Before
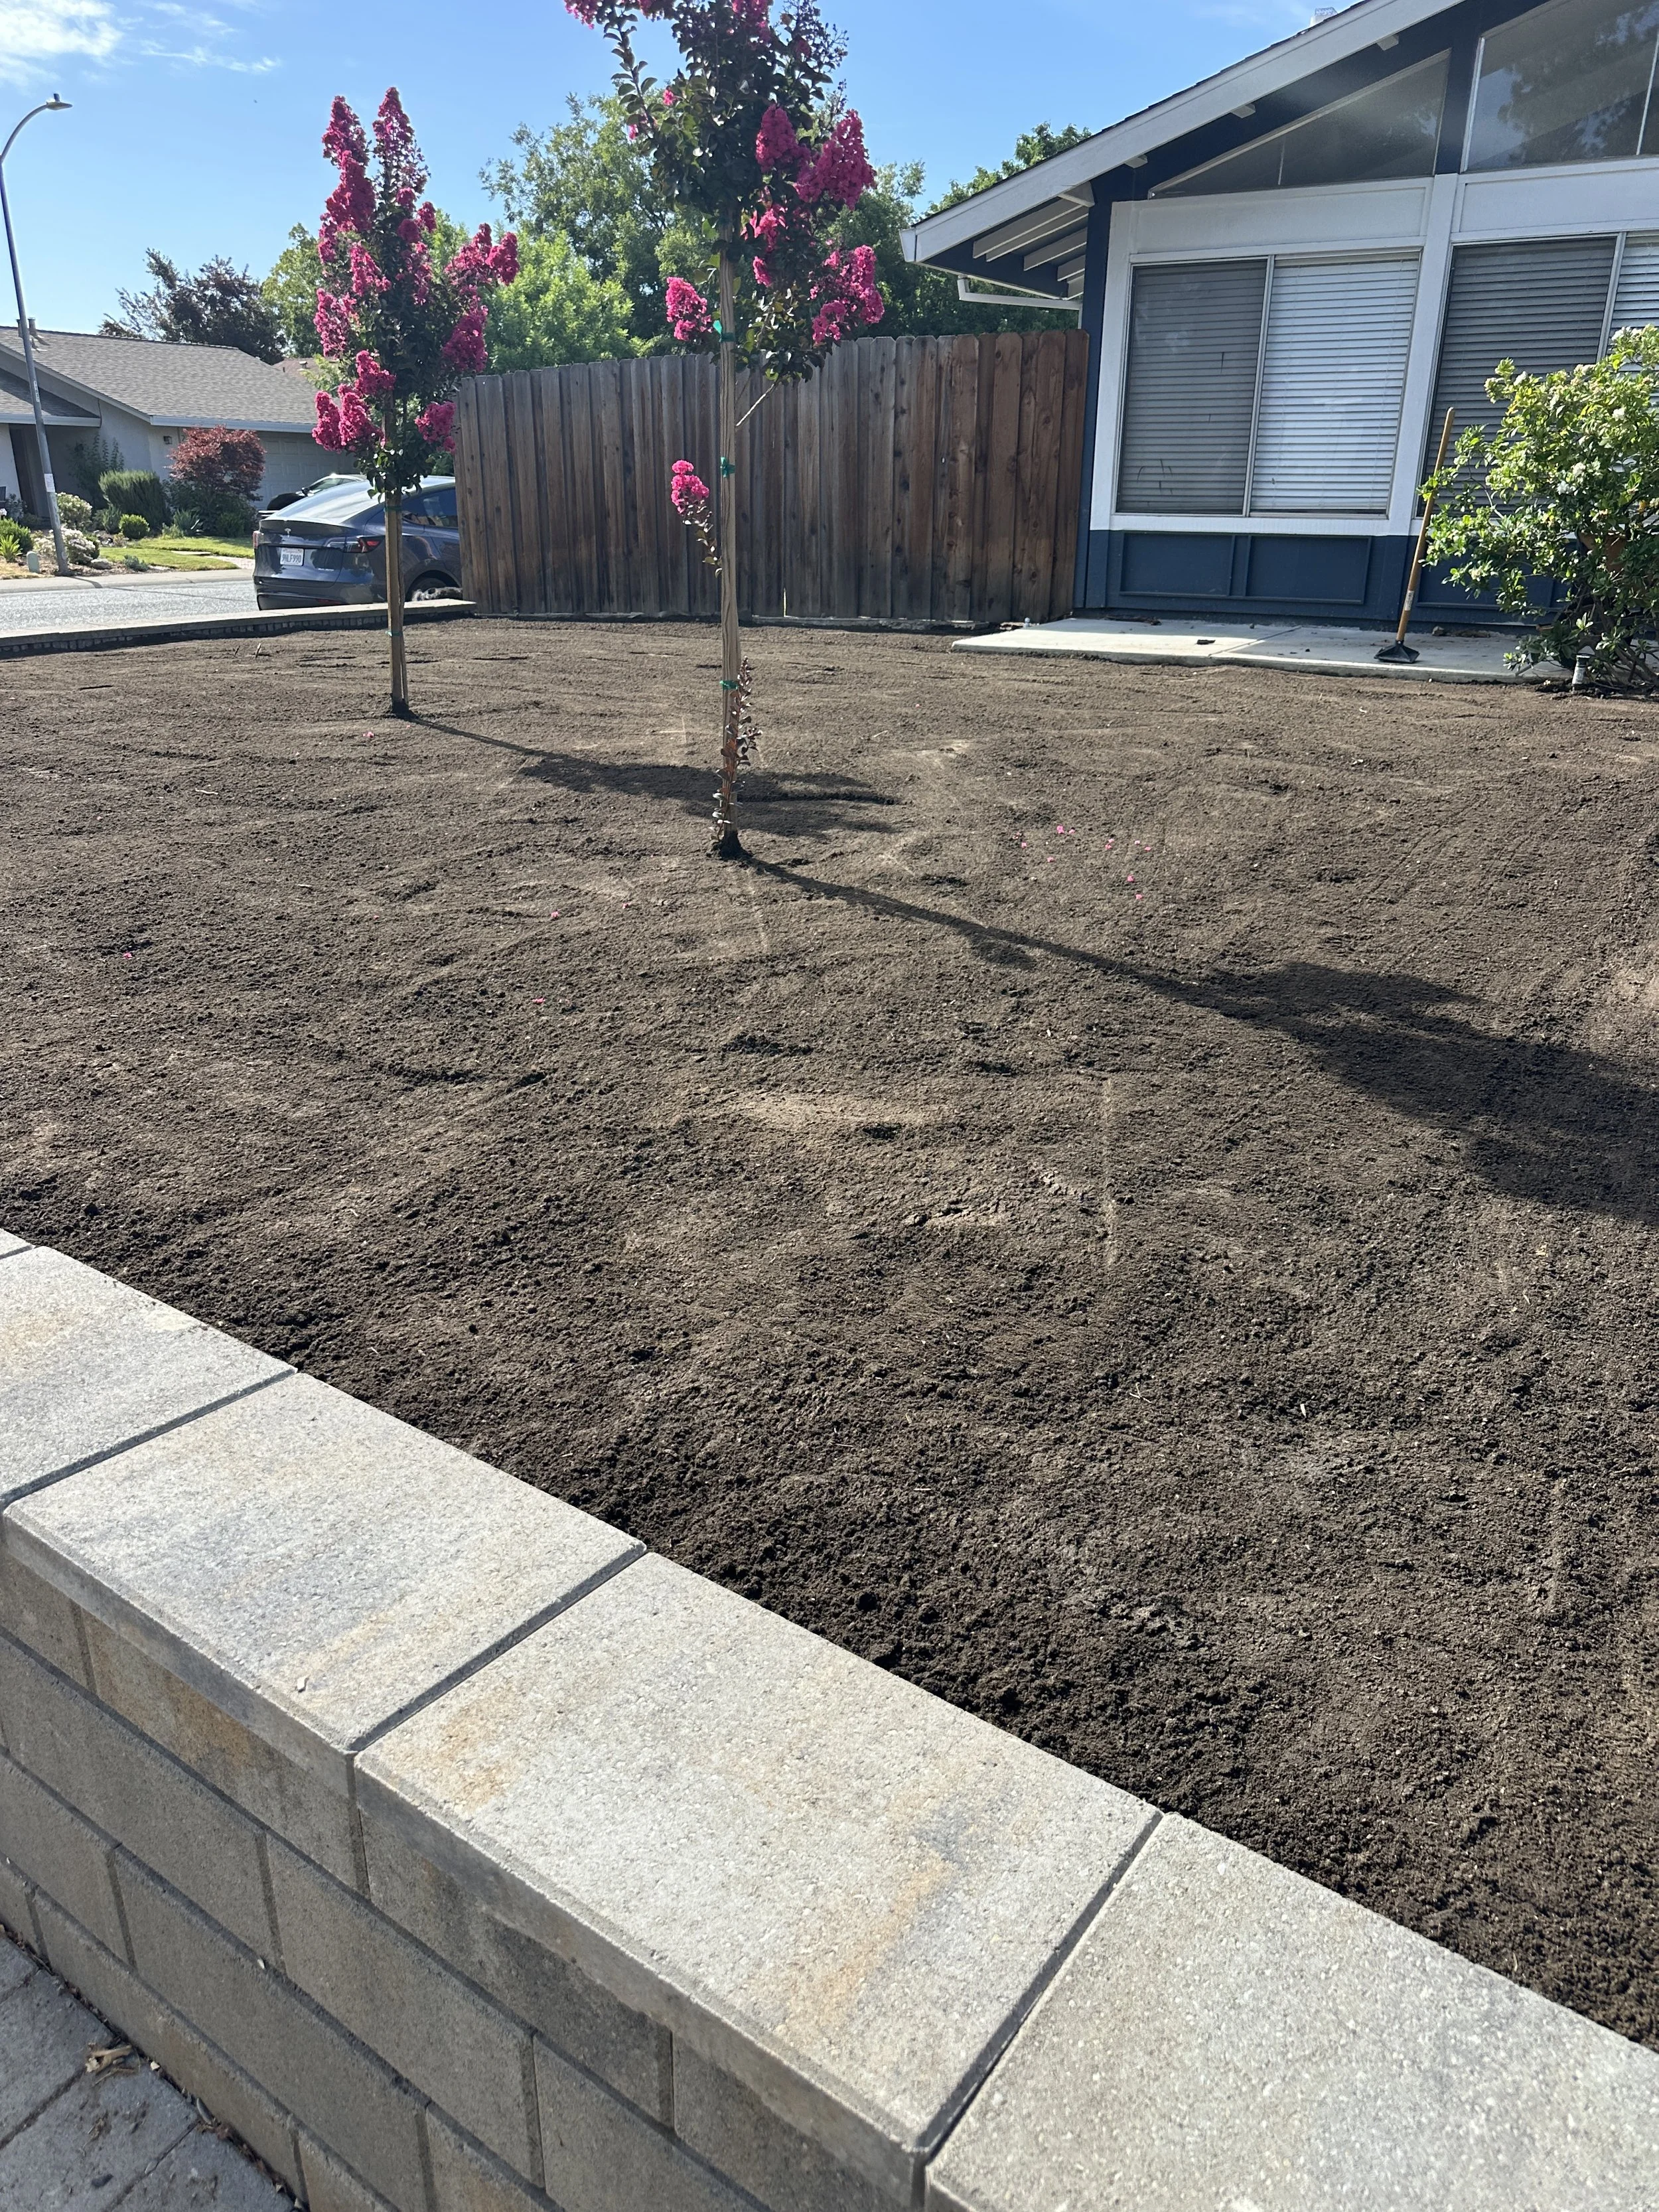
Fine grade & firm
Rake to a smooth, even surface with gentle slope away from structures.
Lightly compact with a roller (about ⅓ full of water) or by heel-to-toe walking—firm enough to walk without sinking, not hardpan.
Set final height
Confirm you’re still ~1 inch below hard borders for a flush finish after sod is laid.
Pre-water the soil (lightly)
Moist, not muddy. Think “wrung-out sponge.” This helps new roots make contact.
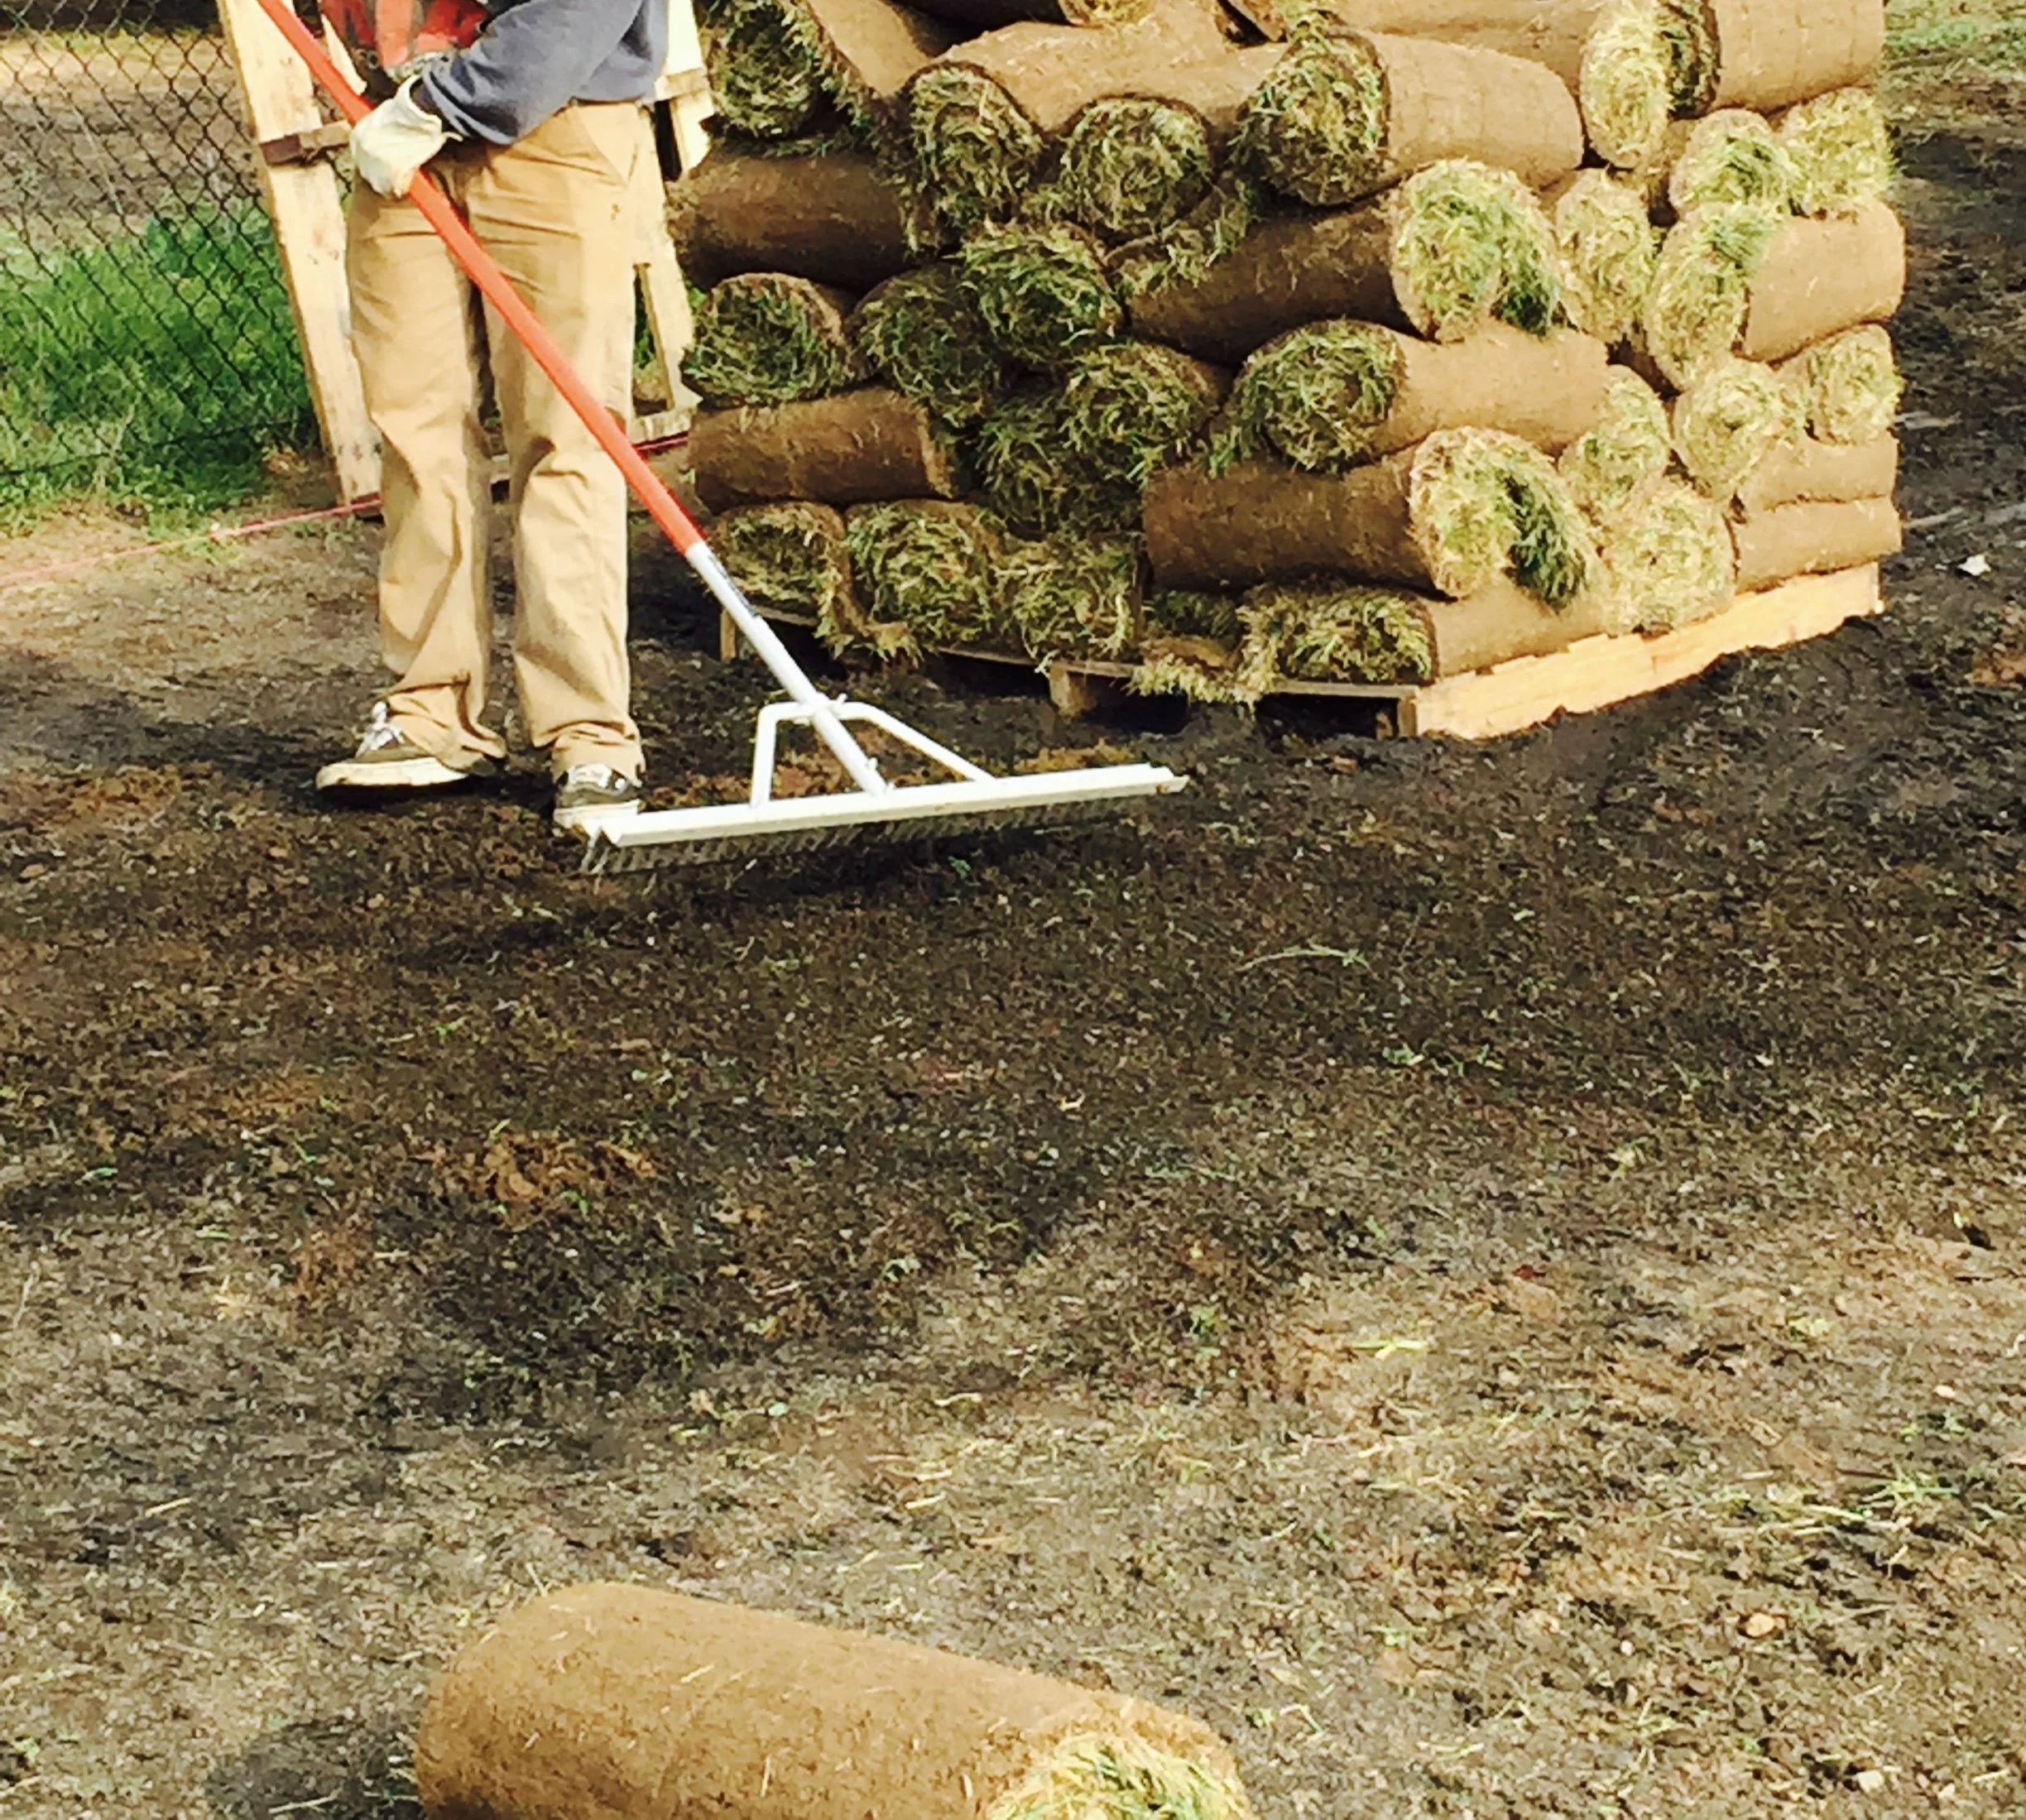
Sod Delivery Day
Final sweep & moisture check
Remove last pebbles/sticks, re-mist the soil surface if it’s dried out.
You’re now ready to lay sod immediately.
2–3 Days Before
Rough grade
Use a landscape rake to knock down high spots and fill low spots.
Remove rocks, roots, and debris as you go.
Loosen/condition the top 2–3 inches
Lightly rototill or deeply rake the clean soil (after removal, not before).
Don’t over-till to powder; you want a crumbly texture that holds shape
Add soil blend as needed
Top-dress to bring the area to grade, finishing about 1 inch below borders/sidewalks so the finished sod sits flush.
A quality blend (70%/ 30% soil blend) improves nutrients and moisture retention.
Pro Tips
Don’t rototill living turf or weeds—you’ll spread and multiply them. Kill first, then remove with a sod cutter.
Dispose of old sod (haul off or compost in a separate pile); don’t bury it under your new lawn.
Sprinkler heads should be set flush with finished sod height—adjust now to avoid cutting new sod later.
Grade away from the house (at least 1–2% slope) to keep water off foundations.
Soil moisture test: Grab a handful—if it clumps and breaks apart easily, it’s right. If it dusts, it’s too dry; if it oozes, it’s too wet.